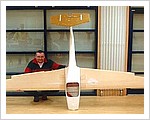
A quarter-scale model of the G109A
Douglas Sheppard – Scale Modeller
I’ve compared the pix to a photo of the completed model that came with the advertising blurb I sent for prior to buying the kit.
It looks as if mine’s a 109, not a 109B. The outline is exactly the same as the 109 as far as I can see and the plans don’t show the foot level vision panels. (Major headache avoided.) I was loathe to cut them out as it would significantly weaken the structure forward of the wings, especially as all the weight (batteries, receiver, etc.) will be as far forward as possible to balance the model.
Beefing up the area around the vision panels would ruin the scale effect of the cockpit, a magnet for any rubber-necker, and the large area of the canopy will just be begging for everyone to have a good look inside.
My plans don’t show the windows at the rear of the canopy either, however, cutting them out is not a problem.
This area is not under the same stresses as the forward vision panels would be and there is bags of room to hide any structural reinforcement required.
The plans don’t give any dimensions for the full size, but the model has a span of 4m 34.5cm and is advertised as 1/4 scale, so if yours is reasonably close to 17m 38cm then I think I’ve won a watch!
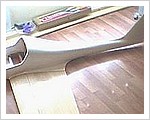
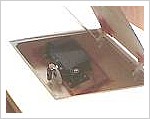
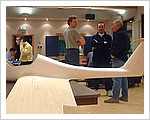
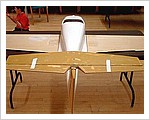
Here are some pix of the model, doesn’t look like much yet but there is the best part of a years work (on and off) in getting to this stage.
The rib is attached to the fuselage with photo mount spray and the wing is fitted against it. Once everything is suitably masked off, and the wing is located in place, 4 hour epoxy resin is poured along the join and allowed to seep between the wing and rib. When fully cured, the wing is removed (hopefully with the rib permanently attached) and cleaned up. Any remaining unevenness or gaps are filled with epoxy putty and sanded to give a perfect join between wing and fuselage. Well that’s the plan.
http://www.hrmc.co.uk/
Scottish Aeromodellers Association
http://www.saaweb.org.uk
Douglas sent the following (March 02):
The model is the David Derby 1/4 scale semi-kit advertised as true scale. It consists of a glass fus, cowl, seats, canopy frame, instrument panel blank and wheel spats. The wings, stab and rudder are polystyrene cores covered with obeche veneer with all the control surfaces requiring to be cut
out and faced with balsa., the rest is up to me.
I’ve spoken to Dave Derby [of Texas] by phone, however, he bought the moulds from someone else (now deceased) and doesn’t know what variant it is. But the quality of the kit is excellent and ,as they say, the price was right so I can’t really complain.
The lump at the front will be I/C. Either an O.S .91 pumped four stroke or an S.C .120 four stroke. My first choice will be the O.S as it can be totally enclosed within the cowl, but the more I look at the model the more I think it may be a bit marginal for power. The recommended power range is .70-.120 four stroke and Dave assures me that his kit flies beautifully on a Laser .100. I guess it will be a case of “suck it and see.”
I already have an Arianne motorglider. Not a scale model, but large as sports models go. At 10.5ft wingspan. it is grossly overpowered on a .51 four stroke. Take off and climb out is at 1/2 throttle and soaring is at slow idle so I may get away with it.
The trick is to find the idle point where there is no thrust or braking effect from the prop. It takes a bit of time and trial & error to find the correct setting (and experimentation with different prop pitches). It will never be perfect but who can tell when you are several hundred feet from the model.
The construction is progressing at a reasonable pace (I am not renowned as a fast builder) and it is at the following stage:
WINGS
Leading and trailing edges fitted. Tip blocks on but not shaped (don’t know the correct profile yet, one of the things I’d like a photo of.) Control surfaces cut out and faced. wing joiners and dihedral braces manufactured and fitted. Only have to glass cloth the wings and fit the servo boxes & air brakes.
FUSELAGE
Reinforcing formers, dihedral brace boxes, tail-wheel mounting and stab seating all fitted. Elevator servo access hatch built and servo fitted.
TAIL FEATHERS
Complete and ready for painting.
I am now at the stage where I have to start adding the scale detail, so here goes,
I need the following details;
COCKPIT
Instrument panel, foot well & rudder pedals, seats and harnessing details, L & R cockpit sides, rear bulkhead, canopy and catches.
WINGS
Tips, root to fus junction, airbrakes and any mass balances if fitted.
COWL
Front view, L &R sides. top & underside. (looking for hinge details, air intakes, etc.)
UNDERCARRIAGE
Leg to fus junction, spats (How are they attached to the legs?), any brake pipes, etc.
FUSELAGE
Any access panels and their location.
Any info/warning stencils on the exterior.
Complete aircraft from all sides.
|
G109 Scale Model
Port side – March 2002 |
Byron Gliding Contact Form:
Fri May 27 2011
Grob 109 1/4 scale model
Hello Byron Gliding Club. My name is Michael Lui and I am a scale RC glider enthusiast from Melbourn. I bought from a friend then exact partial kit of the Grob 109 scale model, featured in your club article. The kit has been sitting in my friend’s garage for many many years. Unfortunately it came without any building instruction or information. I know the article is a very old one. Is it possible for you to put me in touch with the owner of that model.I will appreciate it very much for any assistance you can give me.
hi Michael,
there are several versions and makers of a G109 kit.
AeroNaut makes a 1:6 scale kit: http://www.aero-naut.de/en/products/aircraft/aircraft-models/motor-powered/grob-g-109.html
Roke Models makes a 1:5 and 1:4 kit: http://www.rokemodell.de/2_Katalogseiten/Grob109.htm
Just contact the manufacturers for a manual. Some manuals are already on the manfacturers web sites.
all the best
Erich


